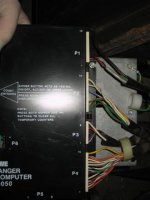
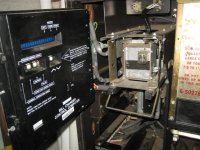
Well Marcus gave me a BC-200 Rowe changer that is new to me, but it has been used. I really appreciate Marcus for giving me the changer as well as all the other parts he has given me in the past! Thanks Marcus!
Are Rowe Changer™s Safe and Secure? Update
I just so happen to have a spare BC-200 in my basement that I got from my Dad instead of him THROWING IT AWAY (Which is what I would like to do!). So I took the front skin off and installed it at the carwash. I have some more work to do like installing the high security plate that I purchased from Kleen-Rite ,which I hope they have in stock or it will take them FOREVER! Have you noticed that Kleen-Rite seems to backorder more stuff now like Procon pumps and Hydrominder tips?
Rowe Changer’s Safe and Secure?
I understand if you give someone enough time anyone can get into a changer. But the way the Rowe changer is designed even installing the high security plate for the BC-1400 does not help the BC-200. The plate was ripped off just like the front skin and the bill acceptor (ba-50) gets bashed, YEA! The problem is the brown metal box is made cheaply and was the weakest link, I will just leave it there.
Standard replacement?
Rowe power problem
I have been talking to Rowe about fixing my Rowe BC-200 changer problems. Tom emailed me about testing my power supply and seemed to think that the changers problems where caused by the power supply. He said that the power supply is suppose to output 14.4 volts on pin 1 (purple wire) on the 13 pin connector (the name is J2020 or P202). I tested 3 power supply today and all were different.
#1 was 14.7 to 14.8 volts, #2 was 12.0 volts, #3 was 14.6 to 14.7 volts
I am not really sure if the 14.6 is within the correct range but all 3 are not 14.4, I will let you know the outcome. Also Tom informed my that Rowe has an exchange program for their power supplies, for $105 they will exchange out your power supply with a working power supply. This is really a great service but I really hope I do not have to use it.
Installing Rowe Kit #27040201 High Security Bill Acceptor Inlet
I am actually installing a High Security bill acceptor on a BC-1400 not a BC-200 this time.
Their are 6 bolts that need to be removed and that is all that I did today. It was a lot harder than I would have thought.
BC-200 links: http://cwguy.com/index.php?s=Rowe+High+Security+Bill+Acceptor+
Installation guide for BC-200 NEXGEN $5 Bill Upgrade (Kit 27050001)
Do you own a Rowe changer? Have you updated to the new $5 bill yet? If you haven’t then you are as bad as I am. But, I got a couple NEXGEN $5 bill upgrades from Rowe International. It came with some instructions and was pretty easy. The hardest part was staying in the equipment room since it is really hot here in Alabama.
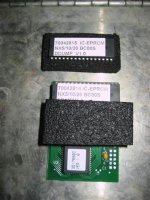
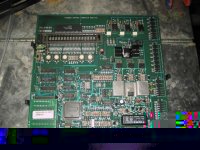
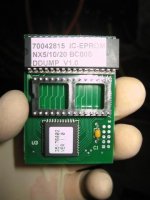
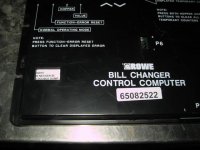
1) Remove all the chips and the 3 stickers from the bag. 2) Turn the machine off then on again if it says “FAST PAY” then you need to find another HowTo somewhere else, this is only for the “DOUBLE DUMP”. 3) Turn the power off then remove the CCC from the machine. 4) Get the board out of the plastic housing. (The third picture red arrow shows what you will be removing.)
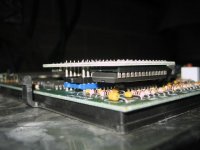
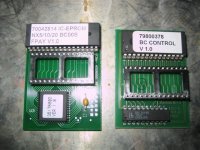
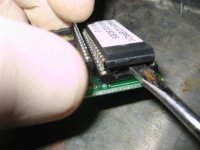
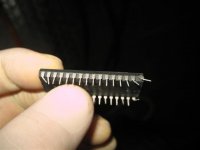
The (yellow arrow) shows the black piece that will be removed from the (red arrow) blue piece. The second picture shows the new board on the left and the old board on the right. 5) (Last picture) Gently remove the Eprom chip for “FAST PAY”. I used a screwdriver and was very careful but……
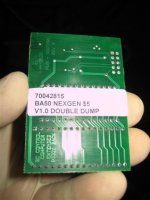
I kind of messed up the FP chip. 6) Now you need to install the “DDUMP V1.0” eprom. This is actually the hardest part and I actually was careful with the pins being lined up correctly. 7) Next flip over the board and install the “DOUBLE DUMP” sticker.
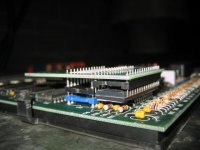
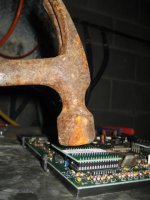
8 ) Now line up the piggy back board with the main ccc board like shown. Skip step nine! 9) Next get a hammer and tap the small board into the ccc board use some force so it will be a snug fit. 10) Put the plastic housing back on and Install the “65082522” sticker and you can see the DD sticker on the left side.
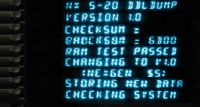
11) Turn the unit on and watch all the updating on the ccc. Then you should get the Night Rider Kit Car lights (the okay light). 12) Test and enjoy! Everything worked great and it was actually very easy to do just skip step 9 unless you want to just purchase a new ccc.
