How to reset your Hamilton Changer C2000 controller


This is for a Hamilton C2000 controller
Assuming you have an issue with your bill changer….

1)  You should find the error code.  This is a code coming from your C2000 controller not your bill acceptor.  (This  light is indicated with the blue arrow.)  The code has 2 flash patterns and a pause in between the flashes  (I included the error chart to help).

  • (In normal operation the light should be green.  Green is the only color the light can be.  🙂 )

2)  Next you fixed the code issue….  Add coins, fix something!  🙂

3)  Push the reset button if required.  The reset button is indicated by the red arrow.

How to troubleshoot not getting any water from your high pressure pump! Part 2

Here is PART 1 on troubleshooting a high pressure pump.  LINK

This problem I believe depended on the time a customer allowed the bay to unload the high pressure.  Which varies greatly and would make this problem almost seem random.  You would also need to pay close attention which I did not…. This would be no problem if you only have one pump or one bay.  🙂  (I checked this pump around 3-4 time…. Sad to say.  The problem is the pump actually works completely fine.  Like video below…. Pressure just seemed high.)


In retrospect after fixing the v-belt on the cat pump…. I remember previous issues I have had.  I had to reset my motor started for some reason?  Now I know why.

At the time I tested the bay and everything was fine…. I thought. I believe now I did not test the gun like the video. I do remember thinking it had high water pressure and I needed to turn it down though.

After I fixed the belt and I thought I was finished with my repair…. I tested the bay.  The bay then popped the breaker.

Which was a surprise…. Usually when repairing one problem it fixes the problem! 🙂 This meant there was obviously another issue.

So I reset the breaker and this time watched and payed attention to how the high purchase gun was working. (Like the video above.) After looking at the pressure problem again it seemed like it had to be the unloader.

I replaced the unloader and the unloader fixed the problem.

How to troubleshoot not getting any water from your high pressure pump!

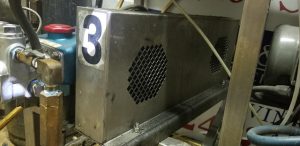
Today, I had a high pressure pump not delivering water! The official complaint was: “I am here with a Coleman rep and we can not figure out what is wrong with all the bays! All the bays do not have high pressure rinse.” I asked are you sure it is all the bays…. But what do you expect?  LOL 🙂 This Coleman rep should also quit…. He allegedly owns a self serve car wash also? I do not believe it. 🙂  He also asked me know to use a Dixmore remote control…. But it is actually not an official remote.  But it is actually worse I believe…. I wrote the directions on how to use the remote on the remote.  Maybe I am to harsh?  🙂

So obviously you can do your troubleshooting in whatever order you want. I try to do the easy stuff first.  Most of the time I like to go straight to the hardest…. But let’s be honest…. That is the dumbest method!

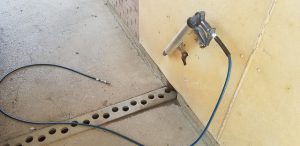
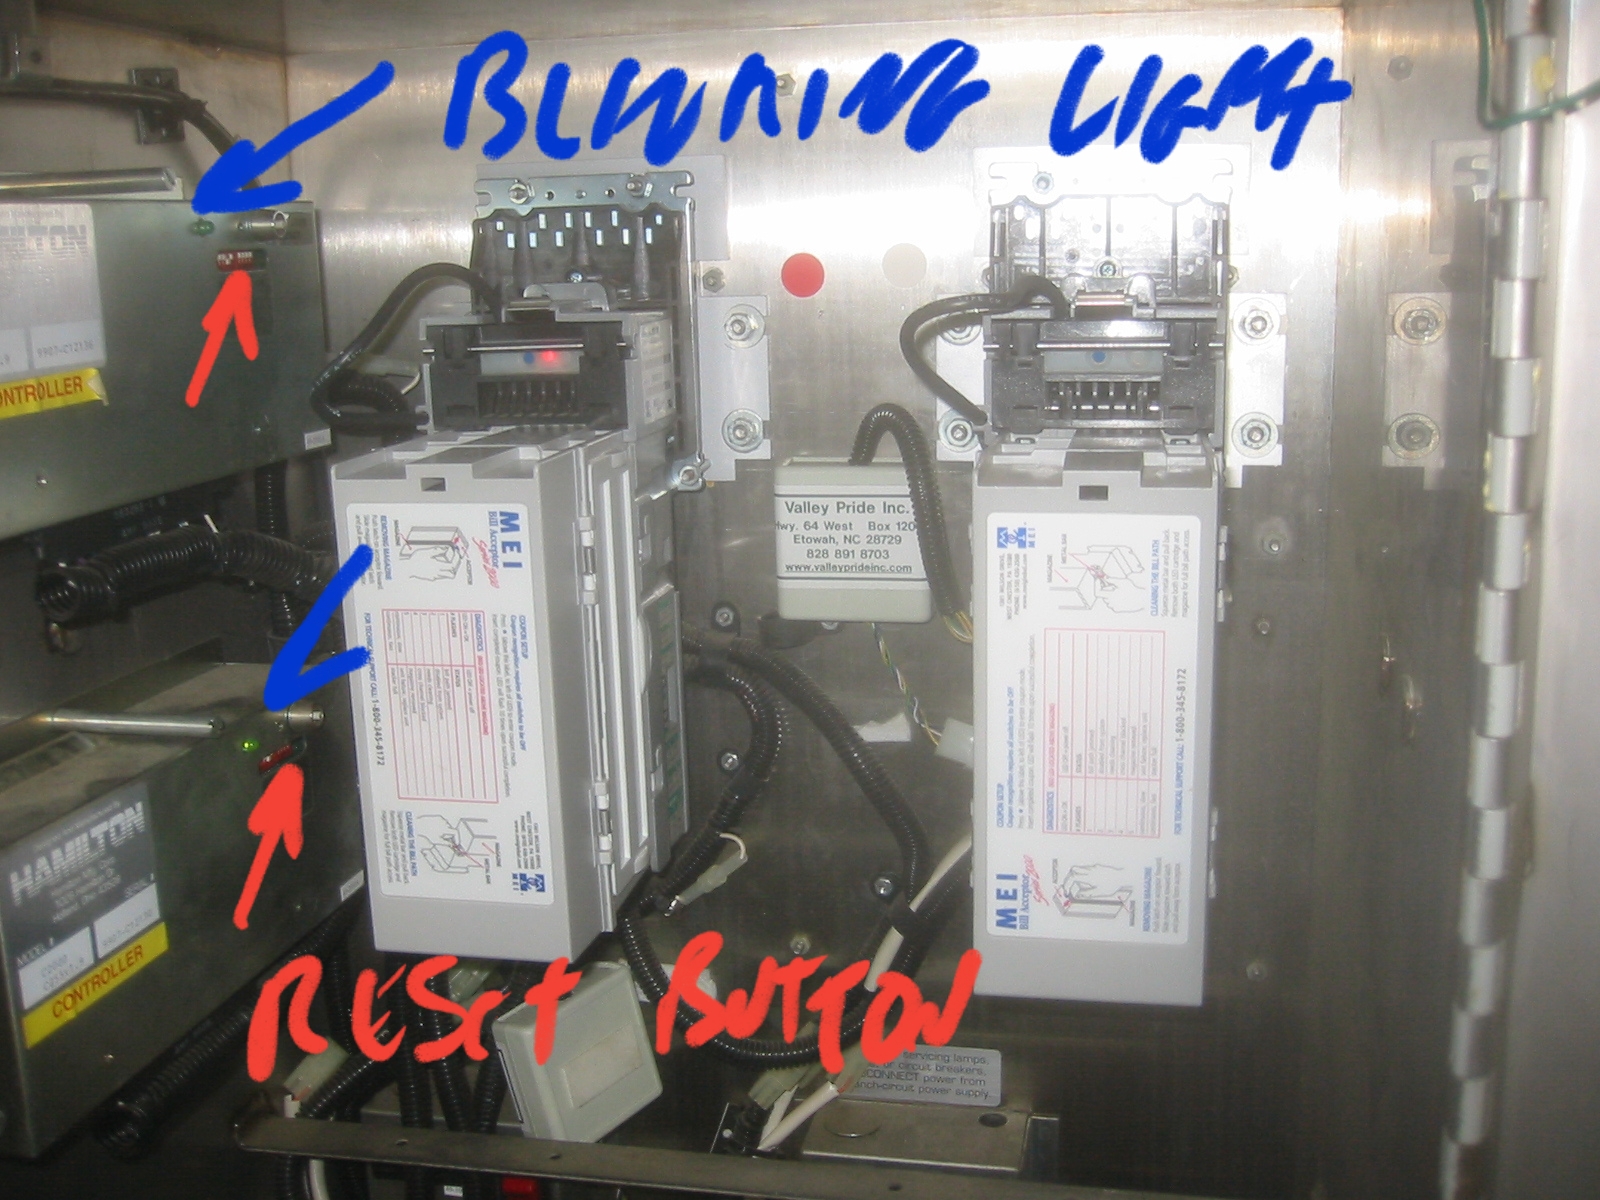
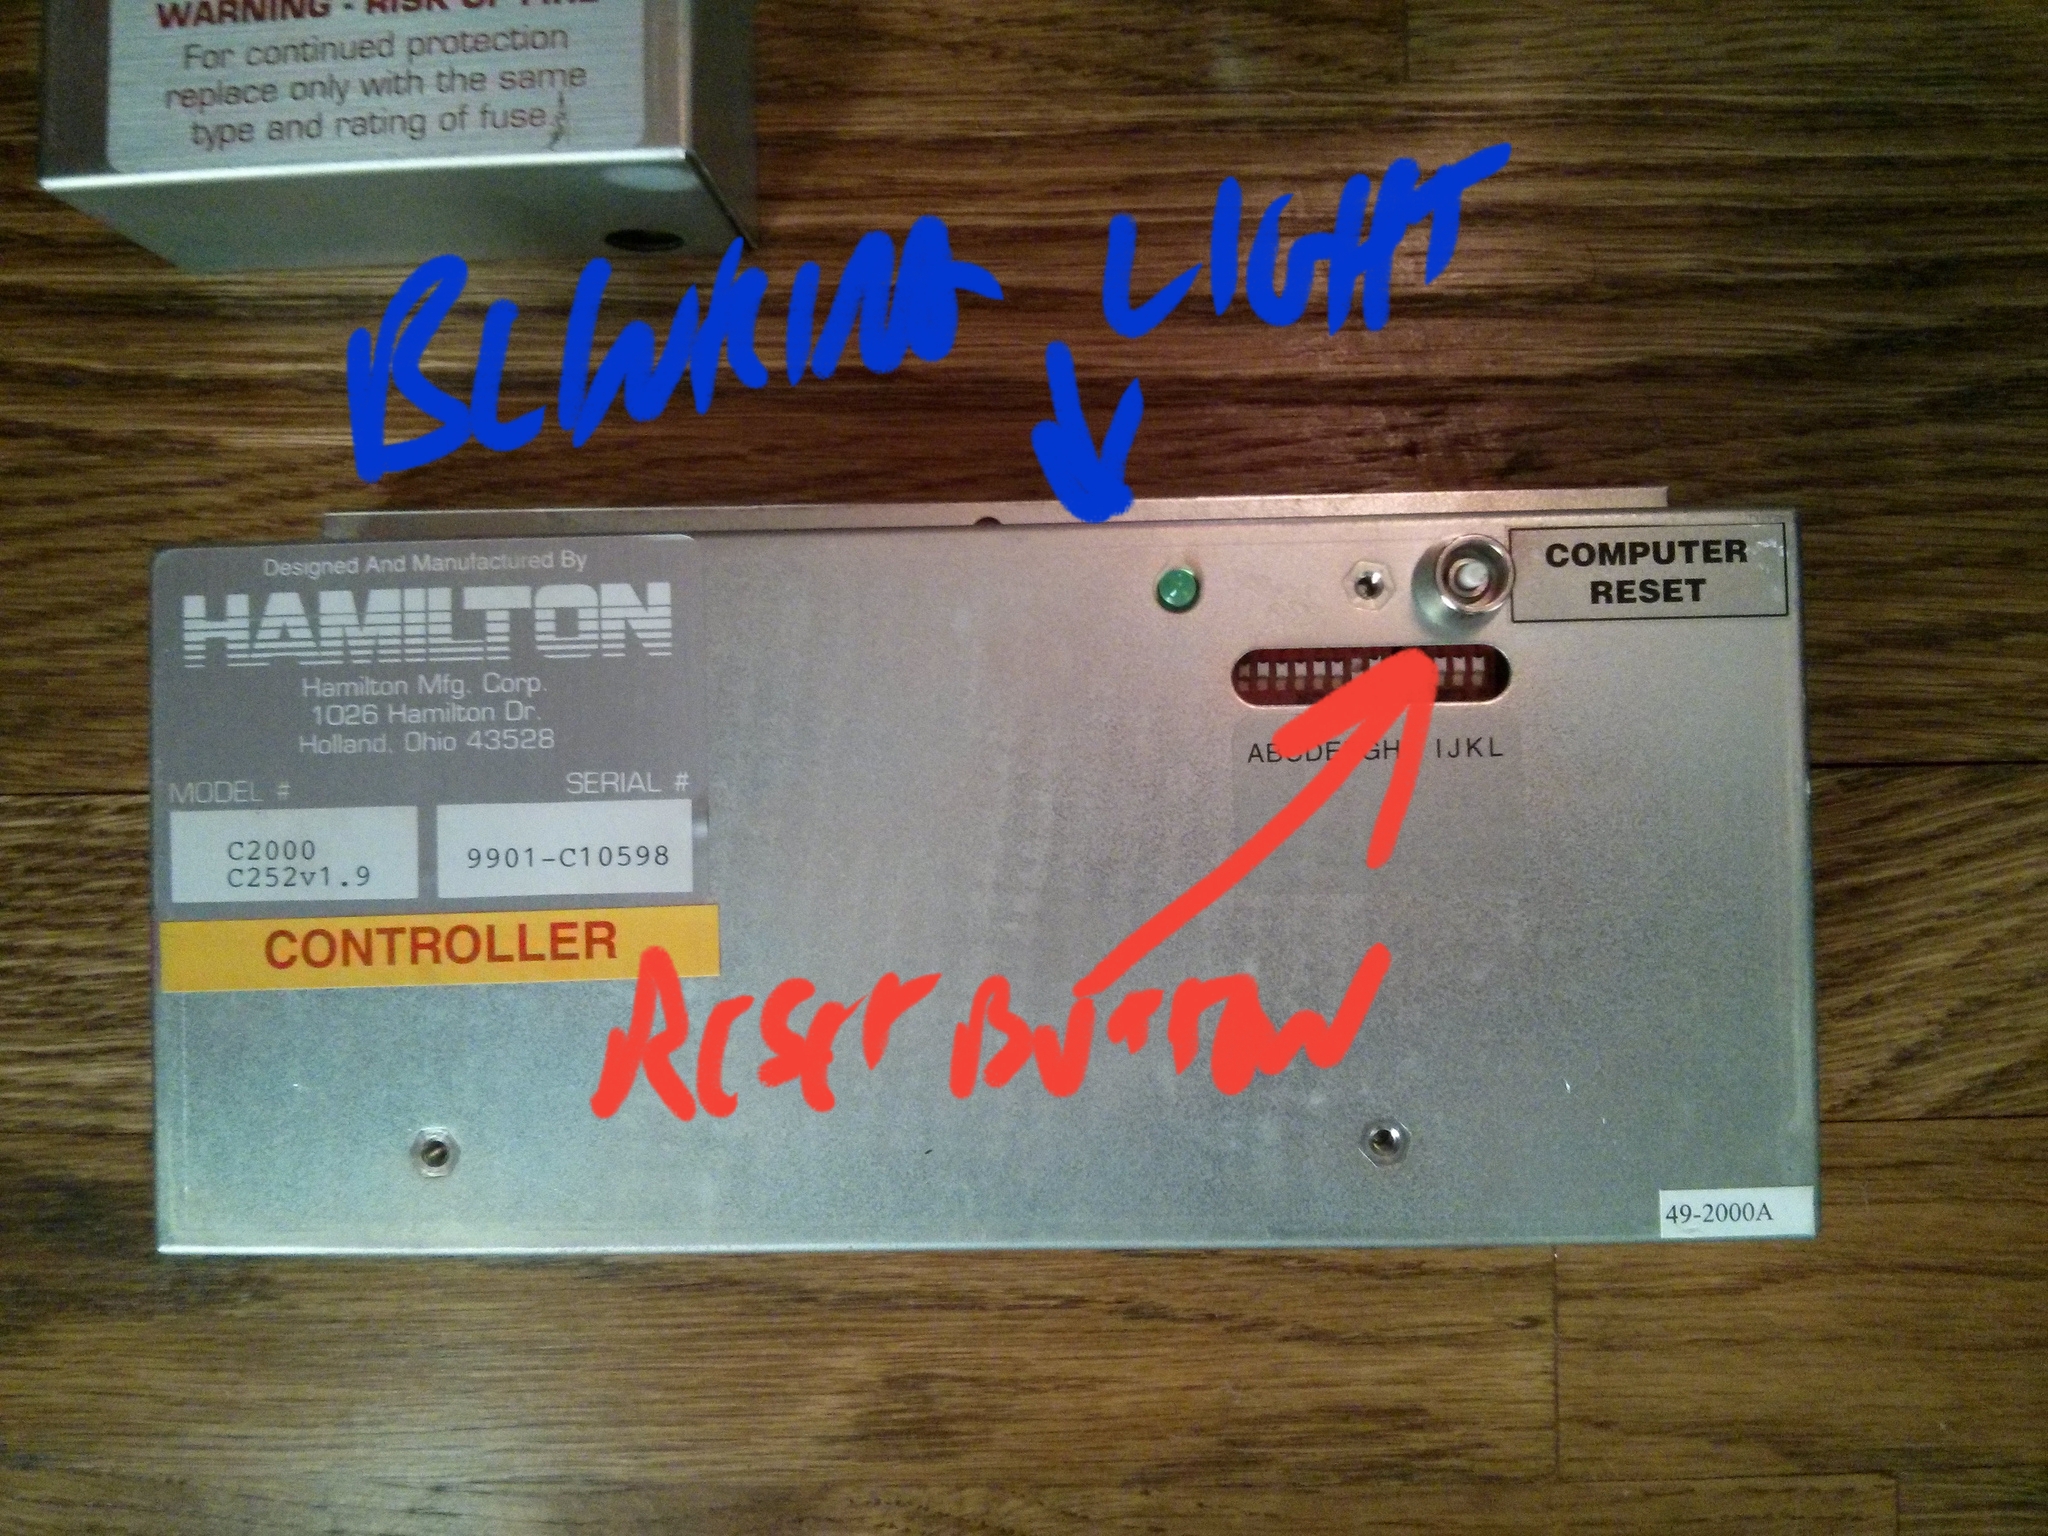
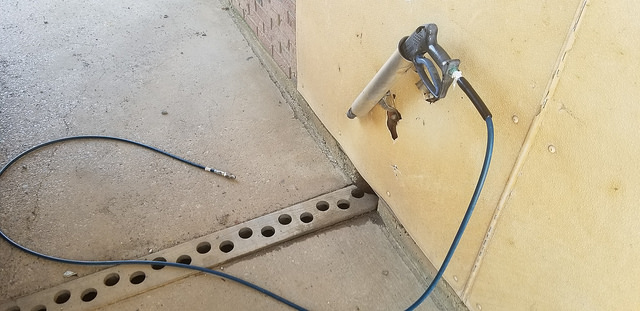
There are quick disconnects in the bays so by removing the gun I can test if there is a clog in the nozzle.
1) Check the nozzle / gun for clogs. Remember a very small amount of dirt or debris can cause the system to not work.


Check your water source to make should you or some random person did not turn it off. I have had this happen before…. By some random person that is…. But I might have done it also? The random person also broken my weep system at least twice. Almost like the random person could care less about my stuff? LOL 🙂
2) Check your water source.


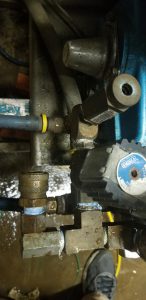
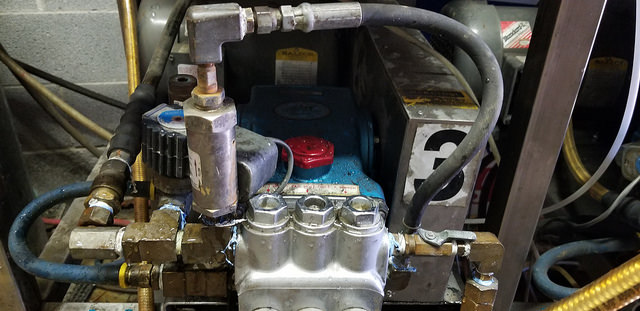
To verify the flow I removed the high pressure hose from the Cat pump…. Then I used the motor starter to see if this fixed the problem.
3) Verify if you are getting high pressure out of the pump.


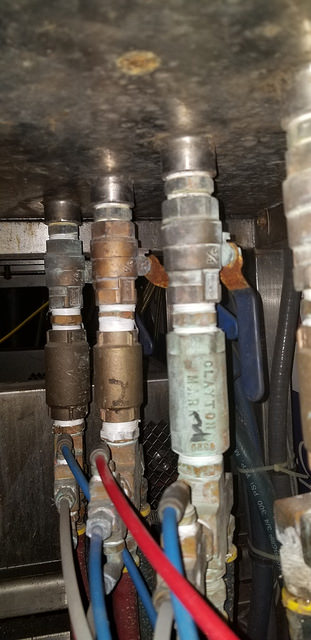
Verify if the water is getting to the pump.  (Water should come out of the hose when removed.)  I removed the water supply line form the Cat pump to verify this…. I was getting water.
4) Verify if the supply line water is getting to the high pressure pump.


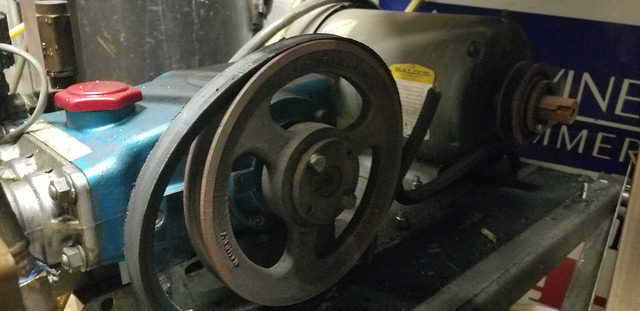
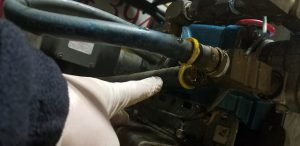
Check to make sure the belt for the motor and high pressure pump is working correctly. This appeared to be my problem…. It actually was not though.  I had a different problem which caused this problem.  But this will help you troubleshoot most of your high pressure pump problems.
5) Verify that the belt for the motor and high pressure pump are at the correct tension and working correctly.


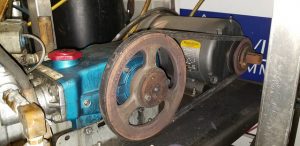
Also when installing a new belt…. I installed mine without removing anything.  Try putting the belt on the small pulley and then turning the belt onto the larger pulley.
6) Size matters….  Do not just slam it in there it will not work!  Be slow, use your hands and be gentle.  This might be something for a different post?  🙂


This would also cover troubleshooting pressure washers.

Tools I used for this repair:  LINK
Here is PART 2 on troubleshooting a high pressure pump. LINK

Crusty Calcium Brass


Interesting how it was just a large chunk of crusty calcium.  I just slightly tapped the fitting on a stainless steel surface and everything worked great.

What might have happened was…. I took everything apart and slammed the brass fitting repeatedly against the stainless surface until all the little pieces came out?  I do not really remember?  🙂

Water leak? Can you spot all of them?

Can you spot the 2 water leaks?  I only spotted one at the time…. but usually larger stupid looking leaks grab your attention more!  LOL 🙂

This image might help…. The second leak is past a ball valve for the weep system.  (I am thinking I have neglected to notice this problem because of global warming…. which ironically was created by the production of solar panels.  At least I think so?  I need a grant to study this.  🙂 )  Anyway it has been warm this winter and I have not used my weep system very much.

DIY MEI Mars Bill Acceptor Belt Repair for your Car Wash

I just went to the LAST Ringling Brothers and Barnum Bailey Circus and I have not taken the hat off since. LOL 🙂

Remember this was MY FIRST TIME! It is also pretty easy to change out the belts. I did it my first time and if you watch this bad video it will take you a lot less time! 🙂

This should also save you a lot of money…. unless I sent my acceptors to the wrong service place? Let me know where you got your acceptors serviced also…. I will probably get lazy again! 🙂

This is also a good thing to be able to do if you do not have extra acceptors…. but you should have extra acceptors!

Concrete Asphalt Patches! LOL :)

I tried lots of different patches and I also read that concrete is a bad idea…. My thoughts were all the recommend ideas were bad ideas.  🙂  So worse case I would just rip it out and concrete it correctly.

So on 4/23/2014 I used Quikrete Crack Resistant Concrete Mix and installed it where my concrete slab met my asphalt.
14399702751_65325d3e0f_z14216621917_c7f1cace1f_k
Today 9/20/2016…. Basically a crack at the concrete.
2016-09-20_11-43-16
I later got confused what I purchased and used Quikrete Masonry Cement Type S by accident…. this is what happened.
Installed 7/6/2015…. this was wider and deeper. 2-4″ wide and 1-2″ deep.
19604611645_6ccb2e62a9_z
Today 9/20/2016…. not as good as the Crack Resistant Mix but better than nothing.
2016-09-20_02-14-2529701987282_60d24e8ee3_z
I used the same Type S below but the cracks were similar to the top pictures and there was far less cracking.
10480712204_dfd51cc0e0_z2016-09-20_11-44-452016-09-20_11-44-17

Liquid Wrench to the Rescue!

2016-08-13_12-05-38
Well my rotary switch became very hard to turn and I left my spares at my house…. So I tried Liquid Wrench.  It actually started to work right away…. But the next day it was working perfectly.  I have never tried this before…. Not sure how I am going to clean it off though?  I just assumed it would not work and I was going to replace the switch the next day anyway.

Fixed one of my Jim Coleman timers…. I did it professional style! :)

wpid-2016-01-02_03-05-42.jpgwpid-2016-01-02_03-05-50.jpgwpid-2016-01-02_03-06-15.jpgwpid-2016-01-02_03-06-27.jpgwpid-2016-01-02_03-06-42.jpg2016-01-02_03-06-552016-01-02_03-08-042016-01-02_03-07-06
If you shake your timer and it sounds like a huge object is loose this is probably the problem. 🙂

My inductor coil fell off…. I soldered additional wires to the ends of the inductor coil wires. Which did not change the voltage. The timer also worked again. I also hot glued it to the board. (Maybe to prevent this from happening again?)

I did not take a picture and I do not know if the timer worked correctly or not. (It was one of my 15 broken Jim Coleman timers though.) Someone unwinded the inductor coil wire to give each side enough wire to solder to the board. Just a note…. this also changes the output voltage. Might not effect things though? I did not want to try this obviously. 🙂